
 Pin it
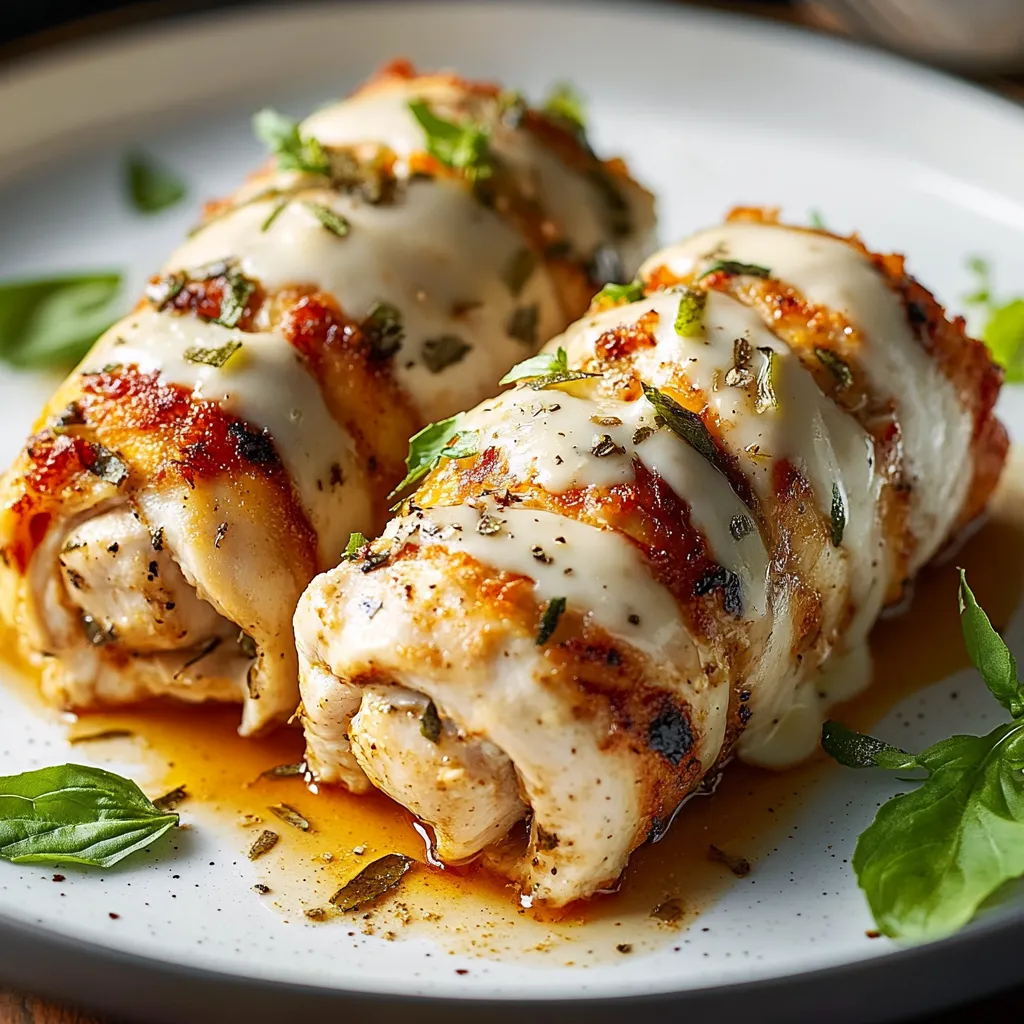
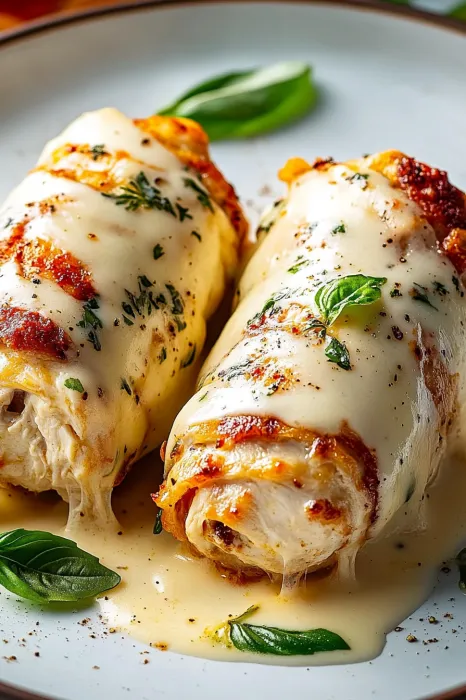
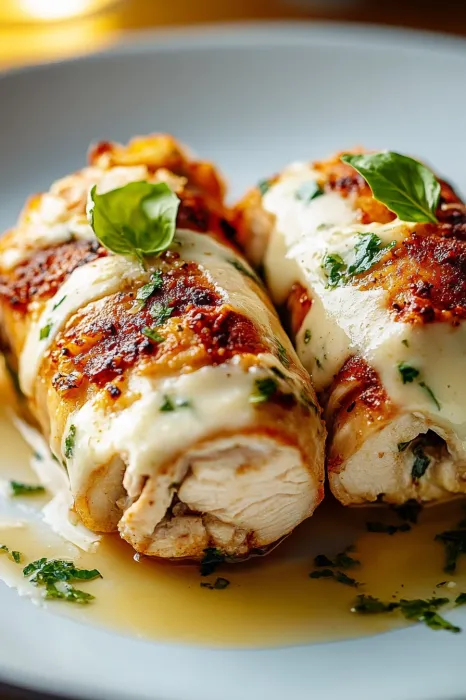
This hearty Chicken Rollatini has been my family's favorite impressive-yet-achievable dinner for years. The combination of tender chicken wrapped around a creamy cheese filling creates a restaurant-worthy meal that's surprisingly simple to prepare at home.
I first made this recipe when trying to recreate an Italian restaurant favorite at home. After several attempts to perfect the technique, this version became our go-to celebration meal that even my picky eaters request by name.
Ingredients
- 4 boneless skinless chicken breasts: Choose uniform sized breasts for even cooking and easier pounding
- 1 cup shredded mozzarella cheese: Provides that classic stretchy cheese pull when served hot
- ½ cup ricotta cheese: Creates a creamy texture throughout the filling
- ¼ cup grated parmesan cheese: Adds a savory depth and saltiness to the filling
- 1 cup fresh spinach sautéed and chopped: Incorporates vegetables seamlessly
- ½ cup Italian seasoned breadcrumbs: Creates the perfect crispy exterior
- 2 large eggs beaten: Acts as the glue for the breadcrumb coating
- 2 tablespoons olive oil: Use a good quality oil for best flavor
- 1 teaspoon garlic powder: Infuses flavor throughout without the texture of fresh garlic
- 1 teaspoon dried basil: Provides classic Italian flavor
- Salt and pepper to taste: Always season each component
- Fresh parsley chopped for garnish: Adds bright color and fresh flavor
- Extra grated parmesan cheese for garnish: Enhances the presentation and flavor
Step-by-Step Instructions
- Prepare the Chicken:
- Place chicken breasts between two sheets of plastic wrap. Use a meat mallet to pound them to ¼-inch thickness. Work from the center outward using gentle but firm strikes to avoid tearing the meat. The uniform thickness ensures even cooking and makes rolling much easier.
- Prepare the Filling:
- In a bowl, mix ricotta, parmesan, mozzarella, sautéed spinach, garlic powder, dried basil, salt, and pepper. Make sure the spinach has cooled slightly before mixing to prevent melting the cheese prematurely. This filling should be thick enough to spread but not so loose that it oozes out during rolling.
- Assemble the Rollatini:
- Lay out the flattened chicken breasts. Spread a thin layer of the cheese filling onto each breast, leaving about a half-inch border around the edges. Roll tightly from the narrower end and secure with toothpicks. Place the toothpicks parallel to the roll to make them easier to remove later.
- Coat the Rolls:
- Dip each roll in the beaten eggs, ensuring it is fully coated on all sides. The egg creates a sticky surface that helps the breadcrumbs adhere. Then roll it in breadcrumbs, pressing gently to create an even crust. For extra crispiness, you can let them rest for 5 minutes before cooking to allow the coating to set.
- Cook the Rollatini:
- Choose your preferred cooking method:
- Baking Method: Preheat your oven to 375°F. Arrange the rolls in a greased baking dish with space between each roll and bake for 25-30 minutes until golden brown and internal temperature reaches 165°F.
- Pan-Frying Method: Heat olive oil in a skillet over medium heat. Cook the rolls for 3-4 minutes on each side until golden, rotating to brown all sides. Then finish in a 375°F oven for 15-20 minutes to ensure they cook through.
- Air Frying Method: Preheat the air fryer to 360°F. Place rolls in the basket without overcrowding and cook for 10-15 minutes, turning halfway through cooking. Work in batches if needed.
- Rest and Serve:
- Allow the rolls to rest for 5 minutes after cooking to help the juices redistribute and the filling to set. Remove toothpicks carefully, garnish with fresh chopped parsley and extra parmesan, and serve warm.
 Pin it
The ricotta cheese is truly the secret ingredient in this recipe. While many rollatini recipes use only mozzarella, the ricotta creates a creamy texture that keeps the filling moist during cooking. My grandmother always insisted on adding it, and after trying versions without, I can confirm she was absolutely right.
Make-Ahead Tips
Chicken rollatini is perfect for meal prep. You can assemble the rolls up to 24 hours before cooking and keep them covered in the refrigerator. For best results, wait to add the breadcrumb coating until just before cooking to maintain maximum crispness. If you need to prepare further in advance, you can freeze the assembled but uncoated rolls for up to 3 months. Thaw completely in the refrigerator before coating and cooking.
Filling Variations
The classic cheese and spinach filling is just the beginning. Try sun-dried tomatoes and basil for a Mediterranean twist, or prosciutto and provolone for a saltier profile. For a heartier version, add cooked and crumbled Italian sausage to the filling. Mushroom lovers can add sautéed mushrooms with a touch of thyme. Each variation maintains the creamy cheese base but creates a completely different flavor experience.
Serving Suggestions
While chicken rollatini is substantial enough to serve on its own, it pairs beautifully with sides. A simple marinara sauce spooned over the top adds moisture and flavor. Serve alongside roasted asparagus, garlic mashed potatoes, or a light arugula salad dressed with lemon and olive oil. For a complete Italian-inspired meal, start with a small portion of pasta tossed in olive oil and herbs.
Troubleshooting Tips
If your rolls are unraveling during cooking, try using more toothpicks or wrapping them more tightly. Chilling the assembled rolls for 15-20 minutes before coating can also help them hold their shape. To prevent dry chicken, be careful not to overcook. Use a meat thermometer to check for doneness at 165°F. If the breadcrumb coating browns too quickly before the chicken is cooked through, cover loosely with foil to prevent burning.
 Pin it
Frequently Asked Questions
- → How do I ensure the chicken cooks evenly?
Pound the chicken breasts to an even ¼-inch thickness before assembling to ensure even cooking throughout.
- → Can I prepare chicken rollatini in advance?
Yes, you can assemble the rolls ahead of time and store them in the refrigerator for up to 24 hours. Cook just before serving.
- → What are alternative cooking methods for chicken rollatini?
You can bake, pan-fry, or air-fry chicken rollatini. Each method results in a golden crust and a juicy interior.
- → Can I customize the filling?
Absolutely! You can add vegetables such as mushrooms or replace spinach with kale or Swiss chard for variety.
- → How should I serve chicken rollatini?
Pair it with a simple green salad, roasted vegetables, or a side of pasta for a complete, satisfying meal.