
 Pin it
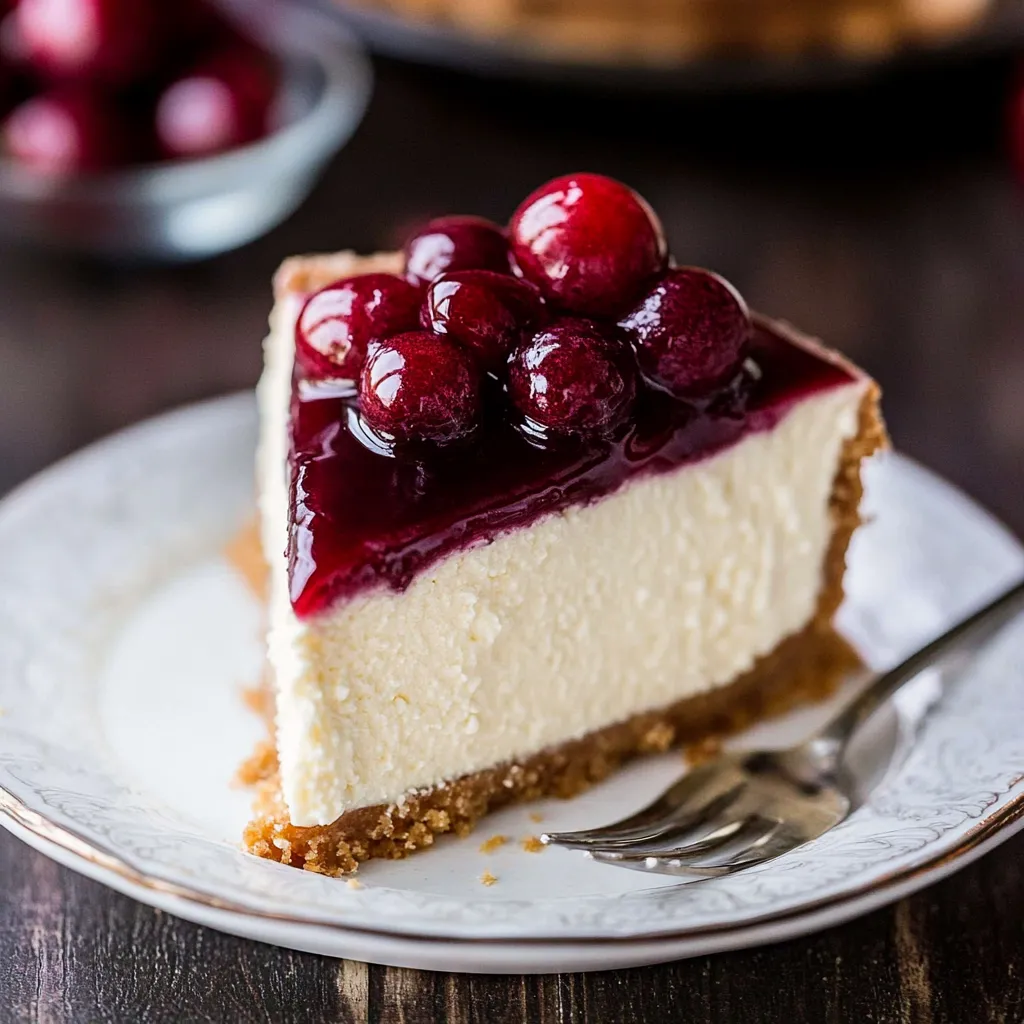
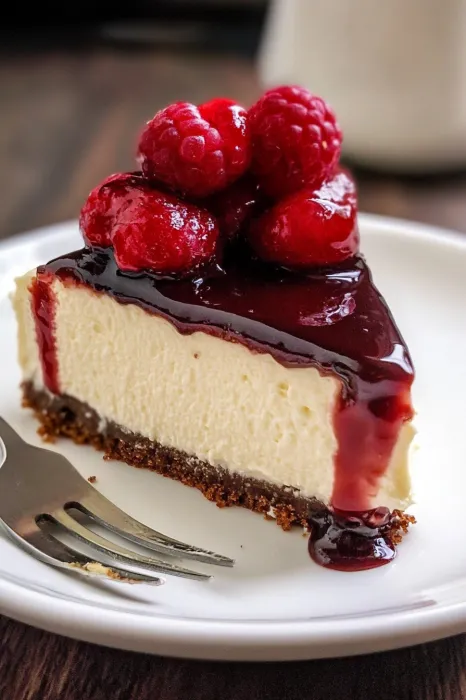
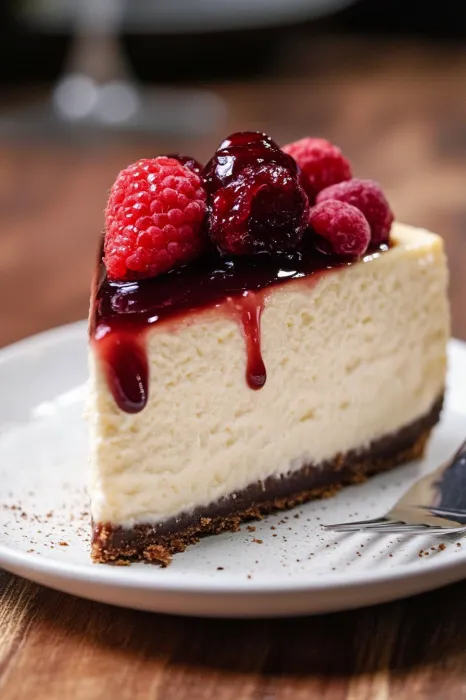
This classic cheesecake recipe has been my secret weapon for special occasions for years. The tall, ultra-creamy New York-style texture achieves that perfect balance between rich indulgence and light fluffiness that's impossible to resist. The water bath method ensures a gorgeous rise with no cracks – something I spent years trying to perfect before discovering this foolproof technique.
I first made this cheesecake for my sister's birthday celebration after she requested something "better than The Cheesecake Factory." The look on her face when she took that first bite told me everything I needed to know – this recipe has been our family's gold standard ever since.
Ingredients
For the Crust
- Graham cracker crumbs: adds that classic honey-sweet foundation that perfectly complements the tangy filling
- Unsalted butter: creates the perfect binding texture when combined with the crumbs
- Granulated sugar: enhances the sweetness and helps create that subtle caramelization
For the Cheesecake
- Cream cheese: forms the heart of this recipe, use full-fat Philadelphia for best results
- Granulated sugar: provides just the right sweetness without overpowering the cream cheese tang
- Large eggs: give structure and richness to the filling, ensuring that perfect creamy consistency
- Sour cream: adds moisture and a subtle tanginess that balances the sweetness beautifully
- Vanilla extract: rounds out all the flavors with warm aromatic notes
Step-by-Step Instructions
- Prepare the Crust:
- Combine graham cracker crumbs with melted butter and sugar until the mixture resembles wet sand. The texture should hold together when pressed between your fingers but still crumble slightly. Press firmly into your springform pan using the bottom of a measuring cup to create an even layer with slight sides. Bake until just golden and fragrant, which develops a deeper flavor and prevents sogginess.
- Wrap the Pan:
- Double wrap your springform pan with heavy-duty foil, ensuring absolutely no gaps or tears where water could seep in. This critical step protects your cheesecake during the water bath baking process. Make sure the foil extends high enough above the pan to prevent any water from splashing over during transfer to the oven.
- Beat the Cream Cheese Mixture:
- Beat cream cheese and sugar for a full five minutes until completely smooth. This extended mixing time is crucial for breaking down any cream cheese lumps and incorporating air for that perfect texture. Room temperature ingredients are absolutely essential here or you will end up with lumps no amount of mixing can fix.
- Add Eggs and Flavorings:
- Add eggs one at a time, mixing just until each disappears into the batter. Overbeating at this stage introduces too much air and can cause cracks. Fold in sour cream and vanilla with the mixer on low until just combined, maintaining that silky smooth consistency we want.
- Prepare the Water Bath:
- Place your foil-wrapped pan in a large roasting dish and carefully pour boiling water halfway up the sides. The water bath regulates temperature and creates a gentle, humid environment that prevents cracks and promotes even baking throughout the cheesecake.
- Bake with Temperature Change:
- Start with high heat to set the structure, then reduce dramatically to slowly and gently cook the filling. This temperature change is the professional secret to achieving that perfect creamy center. Resist the urge to open the oven door during baking as temperature fluctuations can cause collapsing.
- Rest and Chill:
- Allow the cheesecake to cool gradually in the water bath, then at room temperature, before refrigerating overnight. This slow cooling process prevents the dramatic temperature change that can cause the dreaded center crack or sinking.
 Pin it
The cream cheese is truly the star ingredient here. I learned from my grandmother who owned a small bakery that the temperature and quality of your cream cheese makes all the difference. She would always leave hers out overnight wrapped in a towel to ensure it reached the perfect consistency for beating.
Preventing Cheesecake Cracks
The water bath method is essential for preventing cracks, but there are additional techniques that ensure a perfect top. Avoid overbeating your batter after adding eggs, as excess air causes expansion and contraction during baking. Always bring ingredients to room temperature before starting. The slow cooling process is just as important as the baking method itself. Never rush cooling by placing a hot cheesecake in the refrigerator.
Flavor Variations
This base recipe becomes a canvas for countless variations. For chocolate lovers, fold in 8 ounces of melted semisweet chocolate to the batter before baking. Create a citrus version by adding 2 tablespoons of lemon or orange zest. For a seasonal pumpkin variation, replace half cup of cream cheese with 3/4 cup pumpkin puree and add pumpkin pie spices. The possibilities are truly endless, making this recipe one you can return to throughout the year.
Serving Suggestions
While this cheesecake is absolute perfection on its own, serving options can elevate it further. Fresh berries macerated with a touch of sugar create a beautiful contrast to the rich filling. A drizzle of warm chocolate ganache or salted caramel sauce adds decadence. For dinner parties, I prepare individual sauce options in small pitchers, allowing guests to customize their slice. Always serve cheesecake slightly chilled but not cold from the refrigerator for the best flavor and texture.
 Pin it
Frequently Asked Questions
- → How do I prevent cracks in my cheesecake?
Use the water bath method to create a moist baking environment and prevent cracks. Also, avoid overmixing the batter and keep the baking temperature consistent.
- → Why is my cheesecake sinking in the center?
Overmixing the batter can incorporate too much air, causing the center to sink. Ensure ingredients are at room temperature to prevent this issue.
- → How long should I chill the cheesecake before serving?
Chill your cheesecake in the refrigerator for at least 8 hours or overnight to achieve the perfect texture and set.
- → What is the best way to slice a cheesecake cleanly?
Use a sharp knife dipped in warm water and wiped clean between each cut for the most precise slices.
- → Can I freeze the cheesecake for later?
Yes, wrap it securely in plastic wrap and aluminum foil, then freeze for up to 2 months. Thaw in the fridge before serving.