
 Pin it
This hearty three-bean chili has become my go-to dinner solution for busy weeknights when I need something nutritious but don't have hours to spend in the kitchen. The combination of three different beans creates a protein-packed meal that satisfies even the most dedicated meat-eaters in my family without compromising on flavor or texture.
I first created this recipe during a particularly hectic week when I needed to feed my family healthy meals despite our packed schedule. What started as a necessity has become our most requested comfort food, especially during the colder months.
Ingredients
- Olive oil: Forms the flavor base for sautéing vegetables without adding excessive fat
- Onion and bell peppers: Provide sweetness and texture while boosting nutrition
- Fresh garlic cloves: Deliver essential aromatic flavor - look for firm bulbs with tight skin
- Ground cumin: Adds earthy warmth - select whole seeds and grind them yourself for maximum flavor
- Chili powder: Creates the signature spice blend - use a quality brand for best results
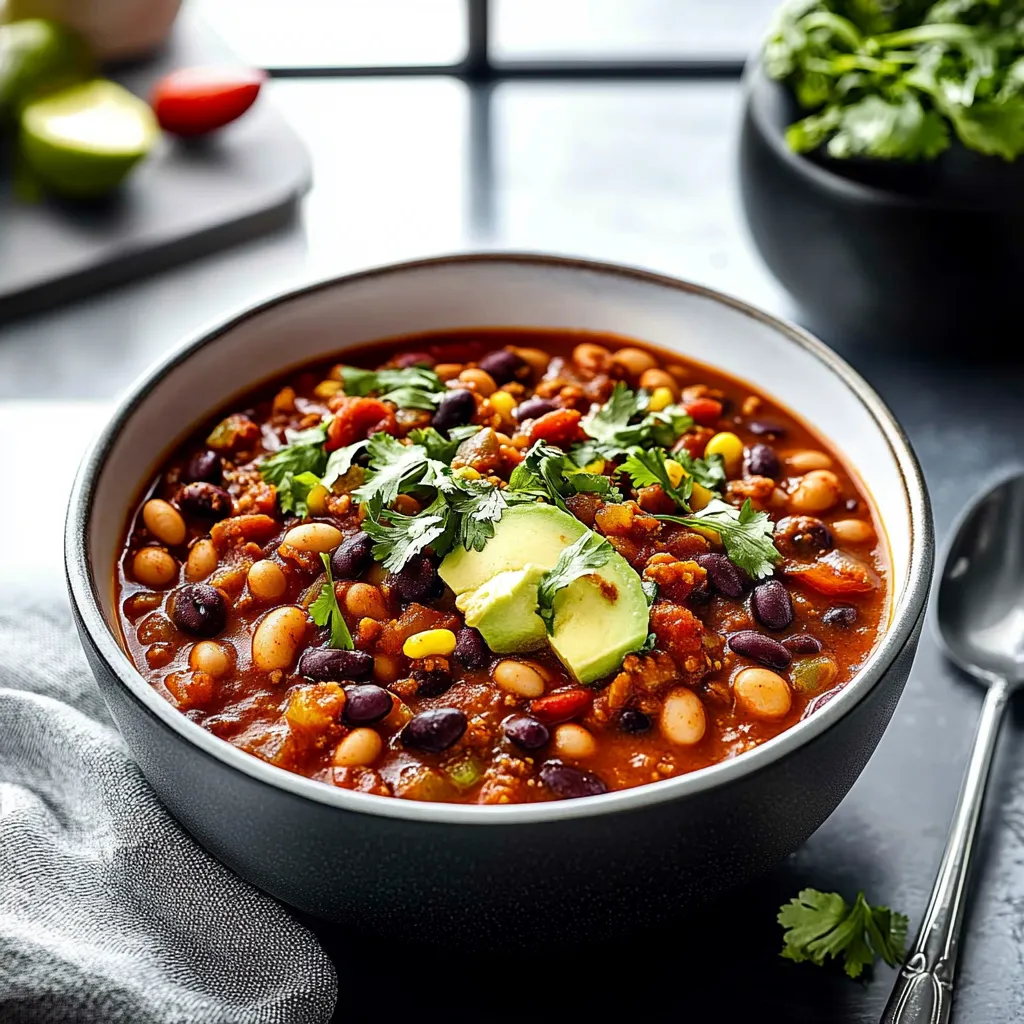
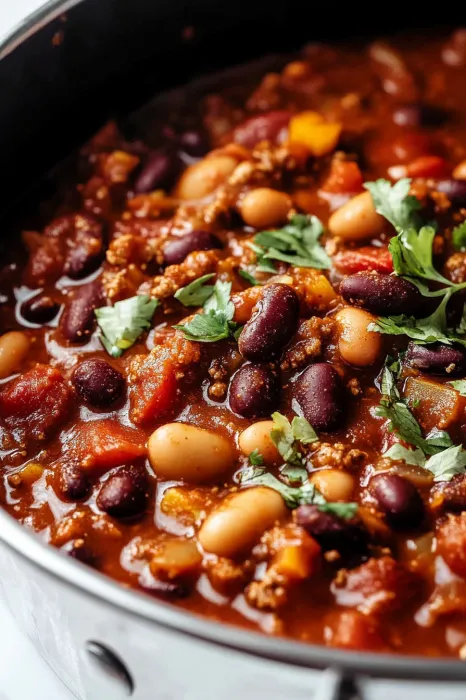
- Three bean varieties: Kidney, black, and chickpeas - offer protein, fiber, and varying textures
- Tomato products: Paste, diced, and sauce create a rich base with complex acidity
- Maple syrup: Balances acidity with natural sweetness - opt for pure maple syrup, not pancake syrup
- Vegetable broth: Thins the consistency while adding depth - use homemade if possible
Step-by-Step Instructions
- Sauté the Aromatics:
- Heat olive oil in a large sauce pan over medium heat and add diced onions, bell peppers, and minced garlic. Cook for 5-6 minutes until vegetables have softened but not browned. The vegetables should become translucent and fragrant, which creates the foundation for the entire dish.
- Bloom the Spices:
- Add cumin, chili powder, and red pepper flakes (if using) to the softened vegetables and stir continuously for 1-2 minutes. This crucial step releases the essential oils in the spices, enhancing their flavor throughout the entire chili. You should smell the spices becoming intensely aromatic.
- Combine and Simmer:
- Add all remaining ingredients including the three types of beans, tomato products, corn, maple syrup, and broth to the pot. Stir thoroughly to combine everything, ensuring the tomato paste is fully incorporated without clumps. Reduce heat to medium-low, cover, and allow to simmer for 20-30 minutes, stirring occasionally to prevent sticking. This gentle cooking period allows the flavors to meld while the chili thickens to the perfect consistency.
- Finish and Serve:
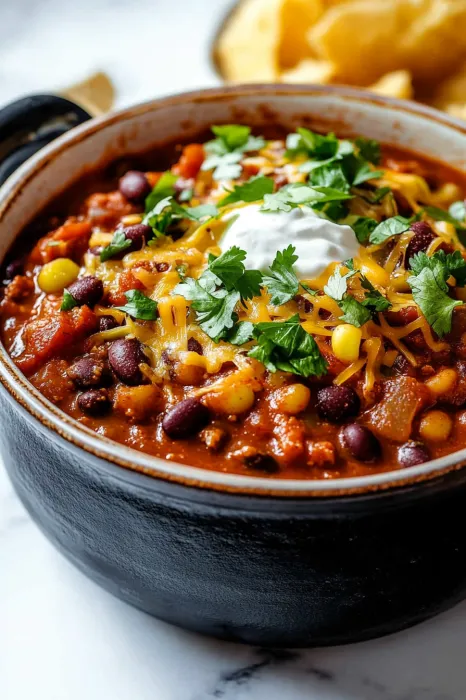
- Taste and adjust seasonings with salt and pepper as needed. The chili should have a rich, balanced flavor with no single ingredient overpowering the others. Serve hot, topped with your favorite garnishes such as diced avocado, green onions, or a dollop of yogurt.
 Pin it
The chickpeas are actually my secret ingredient in this recipe. While many chili recipes stick to just kidney and black beans, I find that chickpeas add a wonderful nutty flavor and hearty texture that takes this chili to the next level. My daughter, who typically avoids beans of any kind, always picks out the chickpeas first, claiming they taste like little flavor bombs.
Storage and Freezing
This chili actually improves with time as the flavors continue to develop. Store it in airtight containers in the refrigerator for up to five days for quick lunches and dinners throughout the week. The chili will thicken as it sits, so you might need to add a splash of broth when reheating.
For longer storage, freeze portions in freezer-safe containers for up to three months. I recommend freezing in individual portions for easy single-serving meals. Thaw overnight in the refrigerator before reheating on the stovetop or microwave until piping hot.
Serving Suggestions
Transform this versatile chili into multiple meals throughout the week. Serve it traditionally in bowls with your favorite toppings or try these creative options: Spoon it over baked sweet potatoes for a nutrient-dense meal, stuff it into bell peppers with a sprinkle of cheese and bake until bubbly, or use it as a hearty filling for burritos or enchiladas.
For a fun party option, serve the chili as a dip with sturdy tortilla chips alongside a toppings bar so guests can customize their portions. This always disappears quickly at gatherings and nobody misses the meat.
Make It Your Own
This recipe is incredibly forgiving and adaptable to your personal preferences. For a smoky flavor, add a teaspoon of smoked paprika along with the other spices. If you enjoy heat, incorporate a diced jalapeño with the bell peppers or add a dash of cayenne powder.
Feel free to swap the beans based on what you have available - pinto beans, navy beans, or even lentils work beautifully in this recipe. During summer months, fresh corn cut from the cob makes a delicious substitute for frozen kernels, adding sweet pops of flavor throughout.
 Pin it
Frequently Asked Questions
- → Can I use canned beans for this chili?
Yes, canned beans are convenient and work perfectly. Be sure to rinse them well to reduce excess sodium.
- → How can I adjust the spice level?
Add more red pepper flakes or chili powder for extra heat, or reduce them for a milder flavor.
- → How long can I store this chili?
The chili can be stored in the fridge for up to five days or in the freezer for up to three months.
- → Can I use different types of beans?
Yes, feel free to substitute with your favorite beans or any beans you have on hand.
- → What toppings go well with this chili?
Great topping options include diced avocado, chopped cilantro, lime juice, shredded cheese, or a dollop of sour cream.